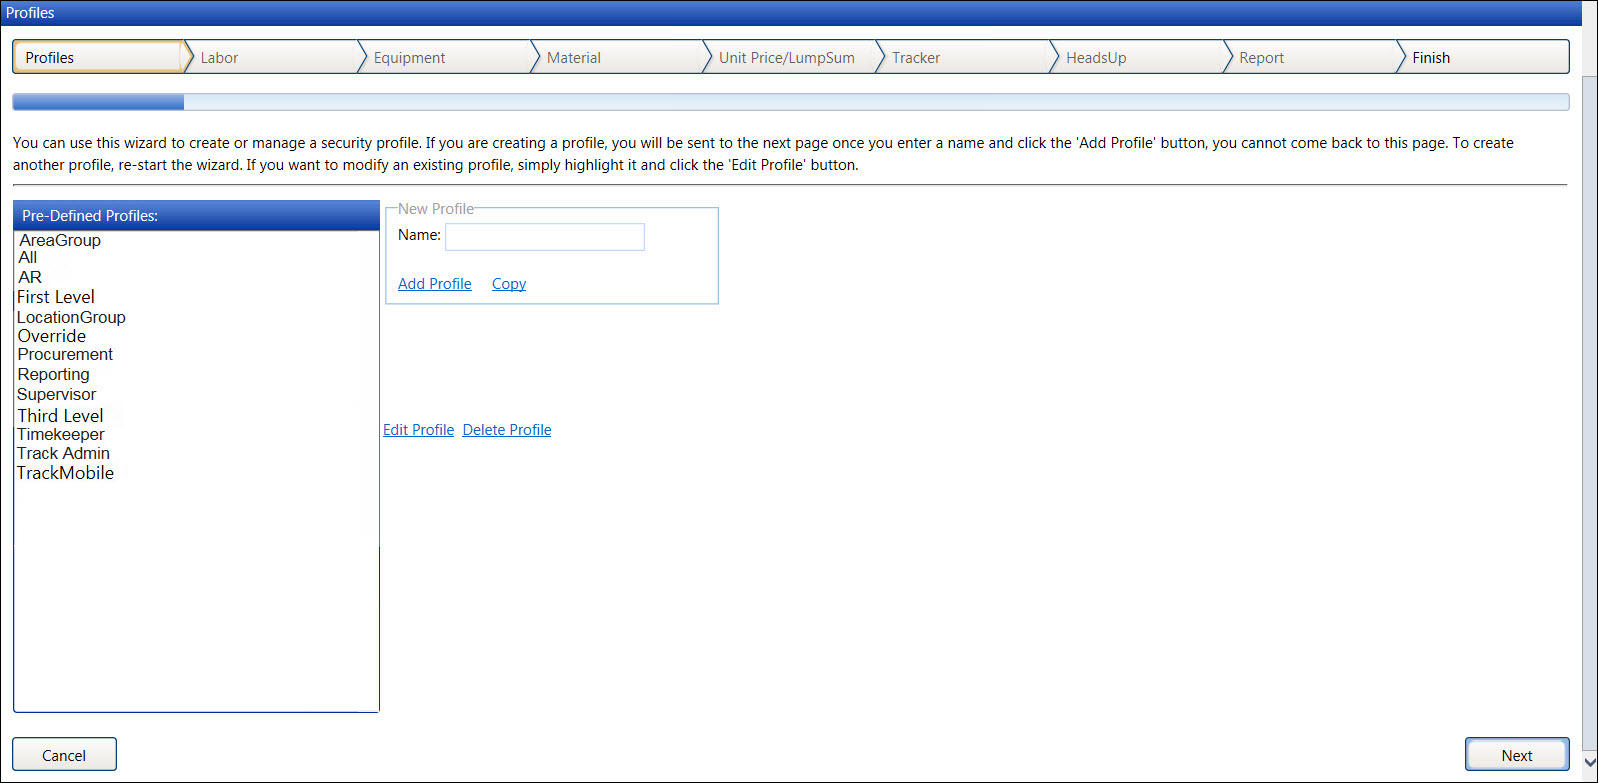
Click the Tools menu link to open the Profiles screen.
Alternatively, hover a mouse pointer over the Tools
menu link then click Profile Management
to open the Profiles screen.

Before creating an account, set up different profiles with access capabilities to the Track application.
After a new profile name is entered into the Name text box and the Add Profile link is selected, the profile name cannot be edited. If not in use, user profiles can be deleted. While adding the profile rules, the Profiles screen is inaccessible unless the Cancel button is selected. Once the profile setup is completed, proceed to Account Setup to set up new accounts.
Click the Tools menu link to open the Profiles screen.
Alternatively, hover a mouse pointer over the Tools
menu link then click Profile Management
to open the Profiles screen.

From the Profiles screen, enter a new profile name into the Name text box.
Click the Add Profile
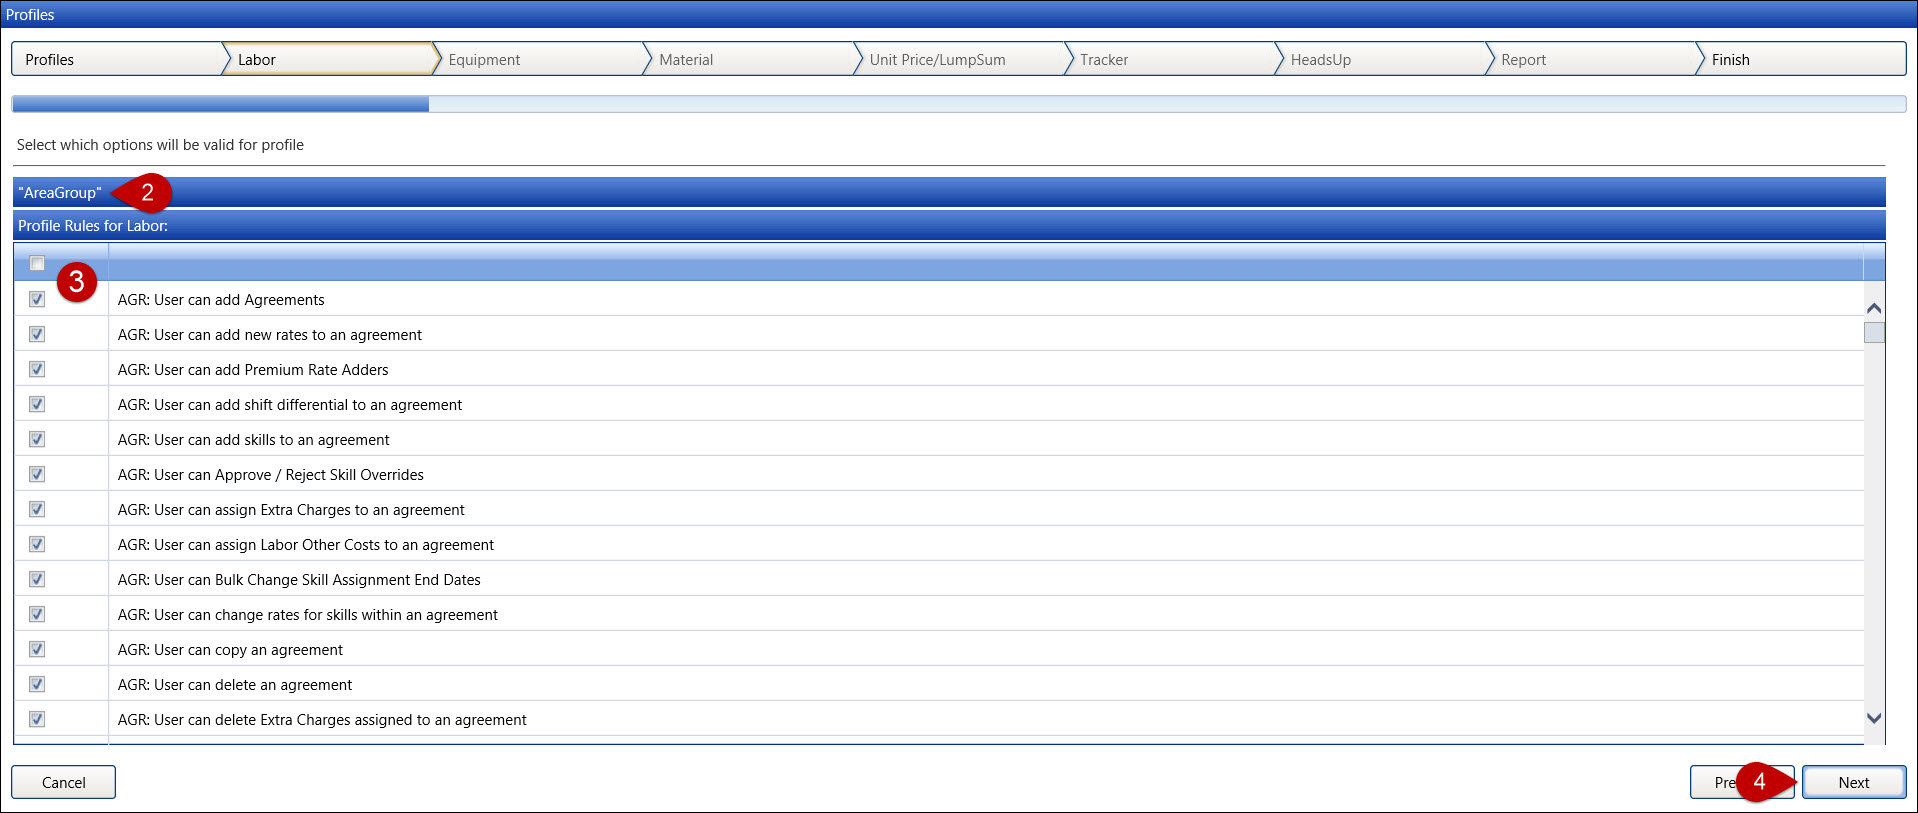
link to open the Profile Rules Wizard, displaying the new profile
name and the Profile Rules for Labor.

Proceed through the Profile Rules Wizard, selecting only the checkboxes next to the profile rules that will apply to the new profile setup.
Click the Next button to proceed to the profile rule screen.
From the Report Filter screen, select a pre-defined report filter
from the Pre-defined Report
Filters drop-down list. Refer to Report
Filters for more information.

Click the Next button to open the last screen, displaying the message, Press Finish to save profile [the new profile name].
Click the Finish button
to save the new profile and return to the Profiles screen, displaying
the new profile in the Pre-Defined Profiles list box.

While selecting the profile rules, click the checkbox, located under the Profile Rules header, to select or deselect all of profile rules that are displayed in the grid.
Click the Previous button to return to the previous screen.
Clicking the Previous button on the Profile Rules for Labor screen or clicking the Cancel button will open the Profiles screen without saving the profile setup. However, the profile name is saved and is displayed in the Pre-Defined Profiles list box. Refer to Edit a Profile for more information on how to edit the profile rules.
Related Topics